


How to Add Blind Spot Monitor and Detection to Your Car?
Car Blind Spot Detection System
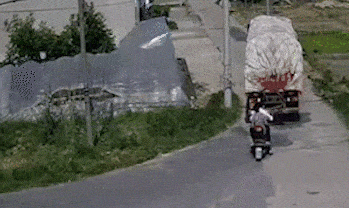
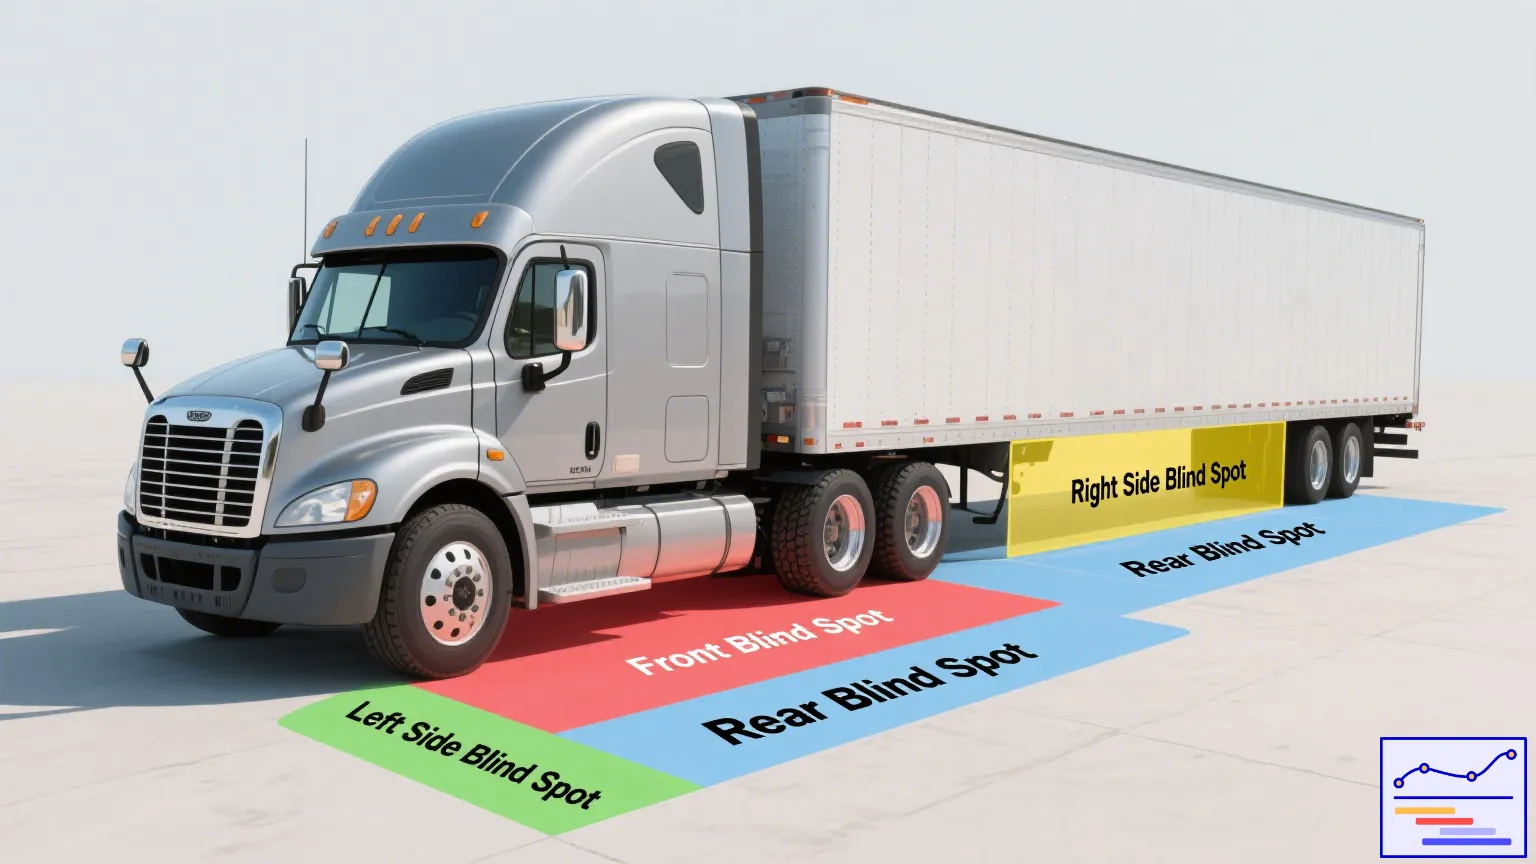
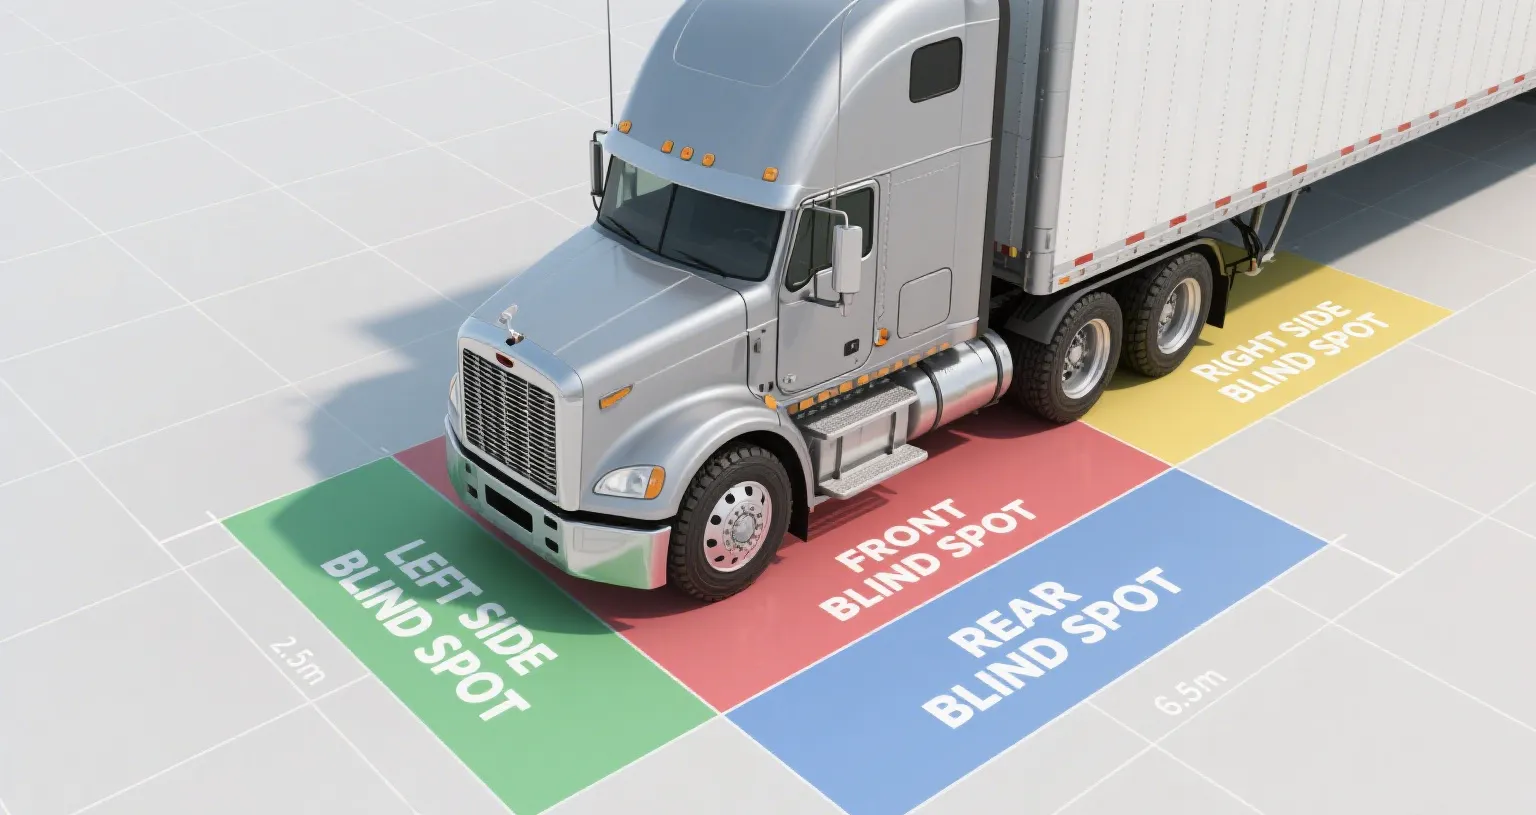
For commercial fleets, blind spots on large vehicles are like “invisible killers.” Delivery trucks and long-distance buses have wide blind zones along their sides and rear, where pedestrians, cyclists, and neighboring vehicles can easily disappear. Statistics show that blind spot accidents in commercial vehicles have a 42% higher fatality ratethan passenger cars, with an average single-incident loss of over $50,000. Relying only on mirrors and driver experience is no longer enough in complex road environments. Installing a professional Blind Spot Monitoring (BSM) system has become a necessity to reduce accident rates and protect both people and assets.
What Is a Retrofit Blind Spot Monitoring System?
A Blind Spot Monitoring (BSM) systemis a safety-assist device that uses sensors and algorithms to actively detect blind spots, designed to overcome the limitations of human vision.
Its core function is to alert the driver with visual and audio warnings during lane changes, turns, or other maneuvers whenever a potential collision risk exists in the blind spot.
Key Features
① Multi-Dimensional Alerts: Combines LED indicators with speaker alarms.
② Easy Installation: Mounted at the rear bumper corners, no drilling required, compatible with most vehicles.
③ Modular Kits: Aftermarket solution, not factory-installed; requires regular upgrades and maintenance.
Core System Components
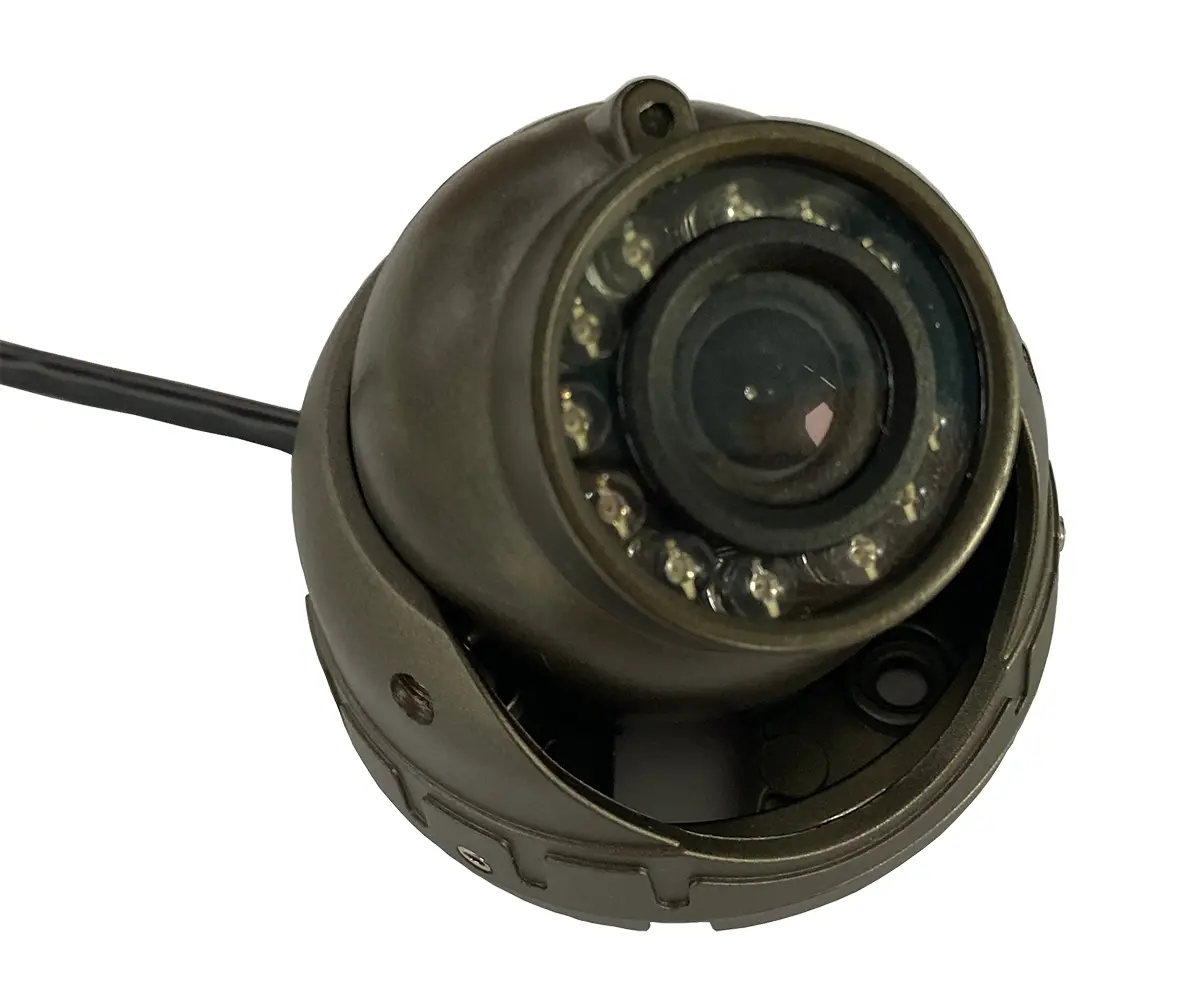
1. Sensors – The “Eyes” of the System
① Detect moving objects and measure distance (up to ~3 meters).
② Common types: LiDAR, radar, sonar.
③ Installed on sides and rear to cover blind zones.
④ May integrate with cameras in side mirrors, activated only above certain speeds (e.g., ≥16 mph) to reduce false alarms.
2. Indicators – The “Language” of the System
① LED lights on the A-pillar + adjustable-volume speaker.
② Behavior:
a. Object detected → LED on.
b. Turn signal on + object detected → flashing LED + sound alarm.
③ Important: Always confirm with mirrors, tech cannot replace driver awareness.
3. Speakers – The “Alarm”
① Sound alerts trigger when signaling while a blind spot is occupied.
② Adds urgency in complex traffic (e.g., lane change on highways, sharp turns).
Why Retrofit on Older Vehicles?
Challenges of Old Cars
① No built-in safety systems(collision alerts, automatic braking).
② Limited visibilitydue to design (thick bumpers, wide A-pillars, enclosed cabin).
③ Outdated for modern traffic, where speed and density are higher.
Benefits of Retrofit
① Covers invisible areasand reduces risks.
② Prevents accidents with larger vehicles(trucks, buses).
③ Faster response timethanks to real-time sensor detection.
Retrofit Installation Guide
General Steps (professional installation recommended):
1. Calibration Preparation
① Align wheels with measuring tape.
② Place calibration mat at 90°.
③ Mark a baseline on bumper with a level tool.
2. Disassembly & Cleaning
① Remove rear bumper (some models require removing tail lights first).
② Clean mounting surfaces with alcohol.
3. Sensor Installation
① Place magnetic brackets at ~20° angle.
② Attach sensors with adhesive or glue.
4. Indicator Installation
Mount LEDs on the A-pillar or inside windshield.
5. System Testing
① Start the car, test warnings with turn signals.
② Simulate blind spot object with an assistant standing nearby.
Special Tips
① Metal bumpers may need reinforcement plates or smart battery packs.
② Non-metal bumpers should use 3M adhesive for extra support.
Built-In vs. Aftermarket: Key Differences
1. Definition
① Built-in: factory-installed and integrated.
② Aftermarket: third-party retrofit kits.
2. Reliability
① Built-in: higher, deeply integrated into vehicle electronics.
② Aftermarket: depends on kit quality and installation.
3. Price
① Built-in: expensive (factory option or included in premium trims).
② Aftermarket: affordable ($250–$1000 range).
4. Maintenance
① Built-in: requires dealership service, costly.
② Aftermarket: cheaper, easier kit replacements.
5. Compatibility
① Built-in: limited to supported factory models.
② Aftermarket: universal fit for most vehicles, some may need customization.

Core Functions of Aftermarket Systems
1. Lane Change Assist (LCA)
① Works above ~16 mph.
② Alerts when signaling while a car is approaching from the blind spot.
2. Blind Spot Detection (BSD)
① Active while reversing.
② Warns of approaching traffic in parking lots or narrow roads.
3. Early Collision Detection
① Two pre-set modes: one for high-speed (larger range), one for low-speed (short range).
② Helps reduce risk of collisions.
4. Detection Range
① Side: 10–15 m (covers adjacent lane).
② Rear: 35–50 m (supports safe highway lane changes).
③ Influenced by radar frequency and bumper material (plastic better than metal).
Choosing the Right Aftermarket Blind Spot Monitor
1. Sensor Accuracy
① Crucial for filtering out false alarms (e.g., guardrails).
② Premium sensors: error rate as low as 0.1 per 1000 km.
2. Ease of Installation
① DIY kits: pre-cut brackets, tool-free.
② Professional kits: for complex bumpers, require skilled installation.
3. Budget & Performance
① Entry-level (≤$250): Basic lane-change assist only.
② Mid-range ($250–500): Adds reverse detection, improved accuracy.
③ High-end (≥$500): Multi-mode alerts, advanced algorithms, minimal false alarms.
For older vehicles, retrofitting a blind spot monitoring system is a cost-effective way to improve safety. It compensates for limited visibility, reduces collision risk, and makes classic cars safer on modern roads.
When choosing a system, focus on accuracy, reliability, and installation quality. Price matters, but safety should always come first—because on the road, safety is the ultimate priority.
Email:hello@yuweitek.com